4-Day Defensive Handgun
FRONT SIGHT COURSE REVIEW
Greg R. (May 3rd–6th, 2013)
Introduction
I arrived at Front Sight a sponge for information, hoping that four days at Front Sight would polish anything that was already correct in my existing technique, and cement any new information and/or techniques in place of ones I needed to discard, because I knew that any day I'd be receiving a call to take a California firearms safety course, and I absolutely wanted to nail the shooting portion of the test.
Given the current ammo shortage, it would have been an expensive proposition to use factory ammo for the 600 rounds required for the four-day course. Fortunately, Front Sight recognizes this new reality and has changed its policy to allow factory reloads. At the same time, I discovered factory reloads from LAX Ammo. I knew it could be disastrous to show up for class with poor-quality ammo of any type, but I took a chance and it paid off. While several of the other students, each of whom was using factory ammo, suffered some kind of ammo- related malfunction, I had none whatsoever.
Preparation
Whichever gun you decide to take to Front Sight, make certain that it doesn't have any sharp edges that can cut you or shred your holster. Modern guns such as the Glock have become much better in this regard, but if you're a fan of the 1911, seriously consider having it "de-horned" by a gunsmith if necessary.
Having previously taken a course with a Springfield XD, I chose to use a Glock 19 for this course. If you're going to be attending a class at Front Sight, I would recommend taking something really simple to run, such as a Glock, five magazines (one for the gun, four in your mag pouches), a good Kydex holster and magazine pouches for four magazines (you start the course with your magazines in your magazine carrier, not in the gun). Front Sight does not allow pocket pistols, so the smallest handgun you should consider is along the lines of the Glock 26.
Raven Concealment Phantom Modular
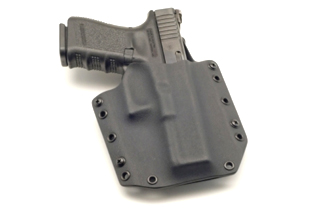
You also need to be aware that Front Sight does not allow the popular Blackhawk Serpa holsters.
You'll need shooting glasses (of course), but Front Sight also considers a hat to be part of your eye protection, as the brim of the hat will help keep hot brass from the person next to you from lodging between your eyeball and your glasses. This is a wise policy; additionally you'll be in the desert where you absolutely will want to have a hat anyway. I wore my ancient Ray-Ban shooting glasses and nobody said anything to me about it, but Front Sight now prefers that you bring glasses that have side shields, presumably as further protection against flying brass. If like me, you have the older-style shooting glasses without built-in side shields, you can buy snap-in side shields from various suppliers starting at around a buck.
You can arrange to rent a gun, holster, belt, and magazine carrier(s) from Front Sight if needed, but I recommend obtaining ammo beforehand unless you're flying in. Front Sight has a deal with Stockpile Defense in Pahrump, but even it seemed to be struggling to keep up with demand.
You'll also need electronic ear protection. It's more expensive than passive plugs, but it will allow you to hear the range commands while protecting you when shooting. Note that you can get (expensive) inside-the-ear hearing protection, but unless you already have it, get the over-the-ear style, which is visible at a glance by the instructors who will be monitoring whether or not you have your hearing protection on. The over-the-ear hearing protectors will also help hold your hat on if it gets windy.
Obviously you'll need to check the weather forecast for the Pahrump area for the time you'll be visiting, and take clothes that allow you to dress appropriately, but give special consideration to your outer shirt and (for four-day course students) the concealment garment you'll be wearing on days three and four. The outer shirts you choose should fit fairly snugly against your body. If your shirt is too loose, or if the bottom isn't long enough fully to tuck into the top of your pants, you will find yourself trying to tuck your shirt into your holster along with your gun, and putting a magazine back into a magazine pouch that's wrapped up in your shirt is a real adventure. For the concealment garment, anything that's too light will be difficult to sweep out of the way, and open-front garments are easier than closed-front garments such as sweaters. Front Sight teaches how to present from concealment using either type, though. If you don't already own something suitable, there is a number of companies making concealment vests for IDPA shooters.
Tru-Spec Tactical Vest

Empty magazines go into your pocket, or onto the ground in an emergency reload — not into your magazine pouch. For this reason, you might consider shorts and/or pants with cargo pockets on the legs. If you like that "tactical" look, 5.11 Tactical has a few choices; if you like something more subtle, you can check out Dickies.
Cell phone coverage at Front Sight is spotty, but you can sign up for optional wi- fi if you need to stay in contact when you're not in class.
Front Sight does not allow video recording of classes, but you may take still photos. I promised myself I'd take a bunch of photos this visit, but — again — didn't have time. Front Sight keeps you busy.
Take a small-to-medium canteen (Front Sight provides plenty of water), and prepare to have the time of your life.
Food and Lodging
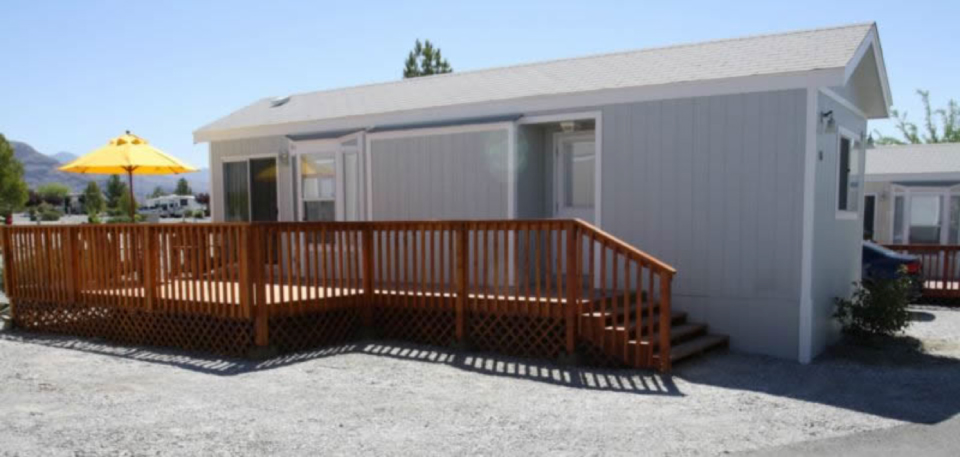
I stayed in one of the new cottages at the Wine Ridge RV Resort, and although space was a bit tight in the cottage, the ambience was much better than Saddle West, where I've stayed before. It doesn't hurt that the best restaurant in town is walking distance from the cottages. It's only a 25-minute drive from the cottages to Front Sight.
Because our cottage had a full kitchen, I took enough food for my breakfasts, lunches, and dinners for the duration of the course. If you're not into doing that much prep, you can order a box lunch to be awaiting you each day from Beach Cafe. Saddle West had a similar boxed lunch you could take with you, if you stay there.
Cottage at Wine Ridge RV Resort
Course schedule
Day One
6:30-8:00 Sign-in and weapons inspection
Handgun student check-in
- Leave bulky items in the car (range bag, cooler, etc.).
- Have your driver's license with you.
- Have your handgun, unloaded with no magazine in the gun.
- Have a sturdy belt, holster, and magazine (or speed loader) pouches. The easiest way to do this is to wear the belt, holster and magazine pouches, put your gun in the holster and the magazines in the mag pouches.
- One box of the ammunition you are going to be using in the course.
As with all good shooting ranges, Front Sight is in the middle of nowhere, "nowhere" being in southern Nevada in the Mojave Desert between Pahrump and Las Vegas, in a beautiful, open valley. Much of the Mojave is classified as "high desert," because the altitude hovers around 3,000 feet. If you are not from a desert area, you should be aware that there is a reason deserts are so-named. Temperatures can be extreme, as do winds, humidity, and rainfall. Preparation includes both bringing what you'll need, and having the proper mind-set. Despite the gorgeous desert and mountain views, you're definitely not in Kansas anymore.
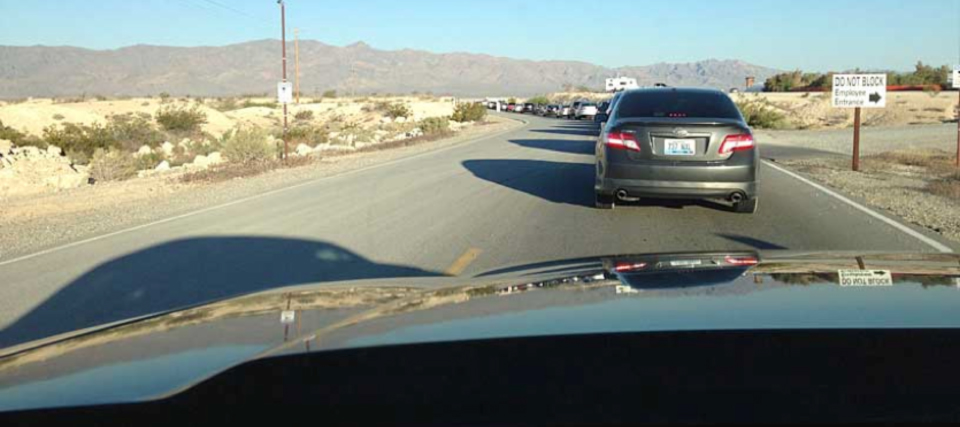
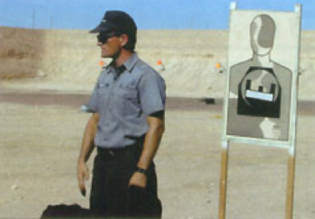
The gates open at 6:30 the first morning, a little earlier than other days, to allow ample time to check in. The inclination is to arrive at 6:00, wait for the gates to open, and then rush to check-in and weapons inspection, but there's always plenty of time; there's no need to obsess about being first in line.
Arriving early at Front Sight
Front Sight layout
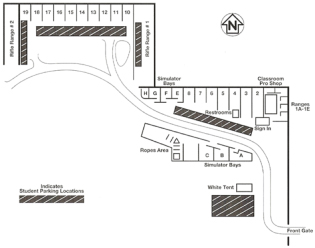
Once the gates open you drive to the parking area closest to the classroom. Along the way, there's a large tent-like building on the left. This is for special instruction, such as concealed carry permit classes. The main classroom is ahead on the right.
After you park, get your gun(s), ammunition, belt, holster, and magazine pouches, head over to the conex to check in, and then proceed to weapons inspection. Front Sight has been doing this for awhile, so neither takes very long, and they have staff on hand to help guide you through the process.
The reason you don't grab all your gear is that next you are headed over to the classroom — a huge building with a free-span roof — and grab a seat. The long rows of tables are a bit close together for my form factor, so I like to arrive early to pick my spot. If you're not as picky or don't feel like simply sitting, you can grab a breakfast burrito from the conex outside the classroom, check out the pro shop, visit the gunsmith, buy ammo from the Stockpile Defense conex, or cruise the shooting bays on range one until lecture time.
Presenter: Brad Ackman
8:00-8:30 Classroom lecture —
Instructor: Paul Beneux
Line coaches: Rena Tucker, Chris Dickson
Brad Ackman has been with Front Sight seemingly forever, so it was an honor and a privilege to have him welcome our class to Front Sight. Brad went over safety issues and the importance of firearms training, and covered the documents that we needed to sign and date before proceeding. Part of the Front Sight teaching method is to repeat key points over and over, and so it was from the start, as one of the documents concerned the dry practice protocol.
Next up was a lecture on the five levels of competence, and then a lecture on handgun "stopping power."
The range officer for this visit was Paul Beneux, who characterized working at Front Sight as the best job he ever had. As with the instructor's procedure during my first visit, Beneux worked from the standard curriculum (which I believe is done both to ensure that nothing is left out, and to coordinate automatically with other classes on other ranges, so that all classes are getting verbal instruction at the same time, which then means that all classes are also shooting at the same time). Paul was ably assisted by Rena Tucker and Chris Dickson. The mix of personalities of the instructors really worked well. Beneux gave the impression of being the dogged taskmaster who was going to get each of us across the "finish line" even if he had to drag us, but with a presentation leavened with a fun and appropriate sense of humor. Tucker was a bundle of energy and tremendously outgoing; infectiously enthusiastic. Dickson was the young disciple; still learning but already competent.
Firearm safety rules
Front Sight firearm safety rules
- 1. Treat every weapon as if it were loaded.
- 2. Never let the muzzle cover anything you are not willing to destroy.
- 3. Keep your finger off the trigger and outside the trigger guard.
- 4. Be sure of your target and what's in line with your target.
Front Sight strictly enforces its four firearm safety rules. As with all rigid sets of rules, you might wonder if they really mean what they say. For example, if you really treat your weapon as if it is loaded at all times, you could never perform a dry practice drill anyplace but a shooting range or the middle of nowhere. There are also some guns that require you to trip the trigger before disassembly, which would be much more difficult if you were treating the gun as if it is loaded.
My version of Rule 1 is: "Treat every weapon as if it is loaded each time you pick it up. If the gun leaves your hand after you verify it is unloaded, you must re-verify that it is unloaded the next time you pick it up." Not as catchy, but for me, functional.
One good thing about the Front Sight safety rules is that you have to break two of the rules before you put yourself in danger of a negligent discharge, which provides an extra margin of safety.
After firearms safety comes range safety. Front Sight has worked out some great techniques to help ensure a safe yet efficient firing line, and they start with dividing each class into two equal relays, pairing each member of one relay with a member of the other relay. While one relay is on the firing line, the other relay stands close behind, each member monitoring his counterpart on the other shift. Partners are not just onlookers, though, as Front Sight has a complete set of verbal and physical responses to various range safety violations. At first, preventing and correcting these violations absorbs a lot of the attention of the shift members who are monitors, but after the second day, things are usually running smoothly enough that partners can help those on the firing line with procedural issues, reinforcing proper weapon handling techniques, and calling shots on target.
Fortunately, the range commands are issued in almost the same order for most of each course, so you will have plenty of opportunities to get into the Front Sight rhythm. Still, you want to pay attention so as not to become one of those students who gets so excited about having mastered one troublesome aspect of shooting that he rushes through the drill ahead of the range officer.
Chamber check/magazine check
- Finger off trigger.
- Weapon in close.
- Move trigger finger away from slide.
- Grasp slide, move back ½ inch to allow view into chamber.
- Pull the slide forward into battery when done.
- Move hand around if necessary to get thumb onto mag release. Hold the front of the slide with the support hand to facilitate this.
- Release mag; index the magazine with your finger as it comes out so it sits in your hand in the proper orientation for re-insertion.
- If no magazine, insert finger or thumb into mag well to verify it's empty.
- On guns with a safety, do all operations on the slide before starting operations on the frame.
Once you have ingrained the chamber check/magazine check routine, you can verify the condition of your weapon at any time quickly and easily. And you do ingrain it quickly, because next up Front Sight teaches you how to load and unload your weapon, and the loading and unloading procedures each begin and end with a chamber check/magazine check. Always. Front Sight doesn't say anything about this, but I feel that these seemingly redundant procedures help you to become more familiar with running your gun. The more comfortable and fluent you are with your weapon, the safer you will be, and although you always want to be safe with your weapon, you definitely need to be safe when you have 40+ other people close by.
The Front Sight method of handling a magazine is to hold the magazine so that the index finger of the support hand touches the tip of the top bullet (or the top of the empty magazine). This is the first of the magazine "indexing" moves, and is the most important. When you grab a new magazine from your mag pouch, Front Sight teaches you to wrap your hand around the mag pouch in such a way that when the magazine comes out of the mag pouch, your finger will already be in position to "index" the magazine to your hand.
Loading
- To insert the magazine, index the back of the magazine on the back of the magazine well with the bottom of the magazine canted slightly "back" from the angle of the mag well.
- Push slightly forward and up smartly on the bottom of the magazine to seat it.
- Rack the slide backward with your support-side hand, allowing your hand to touch your shoulder after releasing the slide at the end of its travel.
Unloading
Similarly, when unloading, you grab the magazine as it drops from the mag well in such a way that your index finger will be in position to touch the top round / top of the empty magazine as it drops into your support hand.
- Hold the gun 90 degrees on the side (ejection port facing the ground) when racking the slide to unload the chamber.
- Off-side hand straight back, and then across the chest and down to your pocket with the unloaded round, to prevent muzzling yourself during the unload.
Grip and Stance
Once everyone has the ability to verify the condition of his weapon, load, and unload, Front Sight shows you its preferred grip and stance. The stance, which has long been known as the Weaver stance, has you at a slight angle to your target, with your "support" shoulder (that is, the shoulder of the arm that is not holding the weapon) forward. If you are a follower of Todd Jarrett or your department requires you to use the isosceles or modified isosceles stance, Front Sight will still teach you without making you change.
Grip
- Grip the gun as high on the frame as you can to enhance control.
- Firing hand thumb high and relaxed.
- Support hand, second knuckle beneath the trigger guard.
- Fingers on fingers, thumbs on thumbs.
Stance
- Feet about shoulder-width apart.
- Support-side foot a few inches ahead of your strong-side foot.
- Body angled ("bladed") slightly relative to your target, feet pointing straight forward from the body (that is, not toward the target).
- Strong arm nearly straight.
- Support arm bent at the elbow, elbow pointed down.
- Raise your weapon to your line of sight; don't lower your head to align with your weapon.
If you are stuck with the isosceles stance, Front Sight will train you without making you change to the Weaver, and you may stand anywhere on the firing line, but I would recommend you try to stand at the extreme left end anytime you can (if you are right-handed; lefties should stand at the extreme right end of the line when possible). The reason is that your relay partner stands behind you watching ("coaching") for safety violations and helping with form and procedure. If you are in a Weaver stance, your coach can better see what you are doing. If you are squared off to the target in the isosceles stance, your coach won't be able to see what you're doing with your support hand, and sometimes it will difficult for him to monitor how you are controlling your muzzle. In an isosceles stance you are more easily able to muzzle the person next to you (during a reload, for example) than if you are in the Weaver stance. It's not a huge thing, but it is something to be aware of.
A couple of the students used slight variations of grips and unless they were shooting poorly, the instructors let them to continue, still with the admonishment to at least try it the Front Sight way.
Three secrets of marksmanship
At this point in the course, you've got your gun out of your holster, checked its condition, loaded it, are holding it correctly and facing in toward the target. Front Sight then shares the three secrets of marksmanship, and you learn the reason why it adopted the name Front Sight.
- Sight alignment — the relationship between the front and rear sights
- Sight picture — the relationship between the aligned sights and the target
- Trigger control / surprise break — manipulating the trigger so that you don't degrade your sight alignment and/or sight picture, and are in the best position for follow-up shots
Front Sight also helps you determine which of your eyes is the dominant one, to aid your hard focus on the front sight. Front Sight also recommends that you close your non-dominant eye, as opposed to leaving it open or semi-open.
If I remember correctly, this is when you start shooting, as the instructors help each student one at a time with sight alignment, sight picture, and trigger control. As mentioned above, they soon get you thinking about combining these three skills into one.
Trigger control
- Finger on the trigger at the center of the first pad at the end of your finger.
- Take out the slack in the trigger.
- Build pressure until the trigger "breaks." This should be a surprise; don't force the break.
- Hold the trigger back until the gun settles.
- Release the trigger just to the reset point.
Taking advantage of trigger reset can be a huge factor in faster, more accurate shooting, but it has typically been treated as an advanced technique. Be that as it may, Beneux had the students shooting (and at least vaguely aware of the trigger reset) well before nailing down the five steps to present the weapon from the holster.
This is not to say that people were dragging their weapons out willy-nilly — Beneux pre-shadowed the presentation steps during the early shooting sessions. I found the non-linear order of instruction very effective in this case.
As for the trigger reset, taking advantage of this aspect of the trigger mechanism allows for faster, more accurate follow-up shots, especially with striker-fired weapons such as the Springfield XD, Smith & Wesson M&P, Ruger SR, and Glock.
For new shooters (and there were plenty new shooters at both the two-day and four-day courses I took), it's great to learn the correct technique right off the bat. For old stick-in-the-muds such as myself, having this technique introduced early on gave me enough time to begin to ditch my old habits and acquire the correct new one(s). Another benefit of the Front Sight approach to trigger reset is that it dovetails with Front Sight's other techniques such as the proper sequence for a controlled pair of shots to the torso, and the designated head shot protocol. Unfortunately, given my ingrained bad habits, I didn't synthesize this for myself until the afternoon of the fourth day.
As for what Front Sight does teach on the first day, it's a lot to absorb before lunch, but amazingly, even the beginners seem to get it.
12:30-1:30 Lunch
Lunch can be eaten in the classroom, which has plenty of seating and climate control, or you can take your lunch back to the range. While you are eating in the classroom, Front Sight has a DVD presentation you can watch.
1:30-2:00 Classroom lecture — Code of Mental Awareness and the Combat Mindset
After lunch, there is a classroom lecture on different levels of awareness, and how to avoid trouble by being more aware of your surroundings. The lecture also includes a discussion of the "combat mindset," the development of which may be key to helping you survive a confrontation in first place.
2:00-5:00 Range activities
Back on the range, Beneux introduced Front Sight's five-step presentation of the weapon from the holster. Before lunch, when removing the weapon from the holster, Beneux had stepped the students through commands to get them doing it a certain way. In the presentation section of the course, he amplified and augmented his previous commands into a unified whole. Knowing the steps and doing the steps are two different things, of course, but the presentation is one of those things you can easily dry practice for ten or 15 minutes a day until you master it, once you know the proper technique. Dry practice makes use of an unloaded weapon in a controlled environment (no ammunition, no distractions, no possibility of a negligent discharge) to duplicate a technique slowly and methodically until you can perform it quickly and smoothly.
Five-step presentation to the target
The Front Sight presentation to the target is used in firing drills, and — of course — when you find yourself in a bad situation and need to get your weapon into the fight immediately.
- Support-side hand to the midsection in an explosive movement — the faster the better. Firing-side hand forced/driven down onto the gun. Firing grip attained.
- Pull gun up until the gun clears the holster. Keep your finger off the trigger.
- Drop the firing-side elbow, rotating the gun up until the bottom of the frame is against your ribcage. The muzzle is pointing down range. (This is also referred to as the close-contact position.)
- Move the gun straight forward, pushing out toward the target. When the gun is away from your body, move your support hand to the gun, acquiring the proper grip. Safety off, finger on the trigger.
- Press out. As soon as you see the front sight in your peripheral vision, move your focus to it.
If you're like most shooters, the two most popular errors occur during Count 4. One is "bowling" with the gun, which means that you let the gun drop instead of pushing straight out toward the target from the close-contact position. The other is the "Lone Ranger" presentation (not Front Sight's terminology), where when you get the gun almost to full extension, you point the muzzle up to the sky and then bring it down to the target.
Presentation to the ready
Front Sight's presentation to the ready is used in dry practice drills. In the real world, you'll probably use it most often to unholster your weapon before putting it away in the safe, but iit can be used if you anticipate trouble and are prevented from escape, but still have to time to prepare for the worst.
- Support-side hand to the midsection in an explosive movement — the faster the better. Firing-side hand forced/driven down onto the gun. Firing grip attained.
- Pull gun up until the gun clears the holster. Keep your finger off the trigger.
- Drop the firing-side elbow, rotating the gun up until the bottom of the frame is against your ribcage. The muzzle is pointing down range. (This is also referred to as the close-contact position.)
- Move the gun forward. When the gun is away from your body, move your support hand to the gun, acquiring the proper grip. Safety off.
- Press out at a 45 degree downward angle. Finger off the trigger.
When Front Sight says "finger off the trigger," they don't mean to lay your finger alongside the trigger on the trigger guard. They want your trigger finger up on the slide. This is probably safer, with the bonus that it's a lot easier for observers to see that your finger really is off the trigger. In fact, you can see if someone on the line has his finger alongside the trigger guard from the support side as well as from the strong side.
After-action drill
Because Front Sight teaches defensive handgun (as opposed to bullseye, recreational, or competition shooting), after you've engaged your target, it's time to move in case the fight isn't yet over. The movement is called the after-action drill. At Front Sight, the after-action drill is typically one step off-line (to the right or left of your previous shooting position), while checking your surroundings for other threats, checking that your target is down, and checking that your gun is still in running condition. Once the need for a weapon no longer exists, or when you're finished with a dry practice drill, you perform the Front Sight after-action drill.
1. Gun to the ready position, move to a new location. In real life, the goals of moving after shooting are 1) to get off-line from where you just took your shots in case someone shoots back at that location; 2) get to concealment or cover. At Front Sight, movement in the after-action drill is to get you used to moving after shooting, as there isn't much room to start with, and no concealment or cover close by. 2. Look behind you on both sides, weapon pointing down range. 3. Check your target for two seconds to ensure that he's no longer a threat. 4. Rotate your torso, shoulders, head, and gun together left and right of the target to check for additional threats. 5. Tilt the muzzle up and check the slide of your gun to verify that the slide is in battery and ready for further action. Re-holstering 1. Bring the gun back to the close-contact position, support hand on your torso. 2. Bring your elbow up and rotate the gun down toward the holster. 3. Safely, slowly holster your weapon.One technique Beneux did not teach us in this class (it might be taught in the advanced classes) is to pause at the close-contact position when holstering your weapon to take one last look around. A couple of us incorporated this into our re-holstering routine, though, without correction by the instructors. Beneux again emphasized the value of dry practice: Going through all the Front Sight procedures with an empty weapon while observing all safety practices, doing it slowly and perfectly. The goal is to be methodical. The speed will come later.
5:15-6:00 Classroom lecture — Moral and Ethical Decisions Associated with the Use of Deadly Force
Day one ends with a classroom lecture on the Moral and Ethical Decisions Associated with the Use of Deadly Force. This lecture is mandatory for first-time and CCW students. I do not remember the lecturer's name. The basic message is that if it's not worth dying for, it's not worth shooting for. In general, "you are universally justified in the necessary use of deadly force when there is a reasonable fear of immediate, unavoidable death or serious bodily injury to an innocent person." "Reasonable" means that someone else in your place would agree with your decision. This becomes important should there be legal action as a result of the shooting.
Anyone you shoot must have:
- The ability to harm an innocent person.
- The opportunity to cause harm.
- The intent to cause harm.
Day Two
During the shooting portions of Day One, I had noticed that one of the other students had good form and was getting good hits on target. It was clear this wasn't his first time at Front Sight. Turned out he was a training officer in Minnesota, meaning that he was the person who trained the other officers in his department, set up the training scenarios, implemented all the safety protocols, etc. In short, he seemed the last person who would need Front Sight. So I asked him about it. It turned out this was his fourth trip to Front Sight. He loved it so much he did the full course, instead of doing just the advanced courses. His reason suprised me: Back home he didn't have anyone to critique him, so Front Sight was invaluable to him on that basis alone.
8:00-12:30 Range activities
Beneux started us off this morning with the tactical reload. The tactical reload is one that is to be performed only when you have determined that your world is safe following your after-action drill. Tactical reload
- Check that you have another loaded magazine. While you are at Front Sight, this magazine should be in your magazine pouch. In fact, it should be the front-most magazine in your magazine pouch.
- Remove the magazine from the gun.
- Put that partial magazine in your pocket for now.
- Acquire fresh magazine.
- Insert into gun.
Later, you can check the magazine in your pocket and, if warranted, return it to your magazine pouch. On the range, Front Sight discourages returning empty magazines to your magazine pouch, a wise practice in my humble opinion.
Given the amount of shooting and reloading you'll be doing, I recommend five magazines, even if you're able to carry just four in your mag pouches. At Front Sight, you usually have a fair amount of time once your relay steps to the line to load, so you will be able to fish that first magazine out from a pocket, leaving all four mag pouches loaded and ready to go. If you have only four magazines, I recommend loading your gun fro the farthest back mag pouch, so that when you are reloading under time pressure you still have mags in the nearest three pouches.
Beneux also went more in-depth into the grip aspect of grip and stance. In gripping the gun, he taught us to apply isometric tension front-to-back — don't squeeze the sides of the gun. This tension helps control recoil, and because you don't have a death grip on the gun, you are better able to align the sights on your target.
Next up were jams and malfunctions. A jam is a mechanical failure that requires a gunsmith. A malfunction is something you can clear relatively quickly to get back into the fight. Front Sight teaches you to identify the symptoms of the various malfunctions, and then apply the appropriate solution.
Type 1 Malfunction: Failure to fire
Symptom: Click instead of a bang when you pull the trigger
Solution:
- Keep weapon high
- Finger straight (off the trigger)
- Tap bottom of the magazine to ensure that it's seated
- Run the slide while turning the gun 90 degrees to the right (rack/flip)
- Upright the gun
- Reacquire your shooting grip and point in
Type 2: Failure to eject
Symptom: Failure to eject (stovepipe) / dead trigger
Solution:
- Move out of the line of fire, check the slide
- Tap the magazine, and rack the slide as you flip the gun on its side (AKA Tap, Rack, Flip)
- After-action drill
Type 3: Feedway stoppage
Symptom: Double feed / brass load (dead trigger)
Solution: (This procedure will clear any malfunction.)
- Move; check slide
- Check for new magazine
- Lock slide back
- Strip old magazine out of gun
- Rack the slide three times
- Grab new magazine, insert, rack the slide
- Reacquire your shooting grip and point in
Type 3: Feedway stoppage (when you have no additional magazines)
- Check for magazine — you have none.
- Lock slide back
- Remove magazine; retain with pinkie finger next to the gun
- Rack three times
- Reinsert magazine
- Rack
- Get back into the fight
Emergency reload
Symptom: Dead trigger (slide may be locked back, too)
- Look at the slide and move.
- Get your thumb on the magazine release button and get a new magazine.
- Once you know you have another magazine, release the empty magazine.
- Insert new magazine, and release the slide.
Speed reload
- Drop partially-depleted magazine and insert a fresh one.
- You've still got a round in the chamber, so you're ready to get back into the fight
Front Sight teaches malfunction and reloading drills in such a way as to separate them from the decision to shoot. This is to help avoid situations where there is no need to shoot, but you complete your malfunction drill with a step that includes re-engaging your target. Under stress, you may intellectually understand that there is no need to shoot, but your muscle memory could cause you to shoot anyway if that's what you are trained to do.
Failure to stop procedure
- Two shots to the chest
- Pause and evaluate
- One shot to the head
In a gun fight, Plan A is two shots (a controlled pair) to the chest (thoracic cavity). If Plan A doesn't work, Plan B is a head shot. If Plan B doesn't work, there is no Plan C. Keep employing Plan B until it works. 1:30-2:15 Classroom lecture — Problems 2 and 3; Criminal and Civil Liability The after-lunch classroom lecture on criminal and civil liabilities that arise out of using a gun in self defense is sobering. According to Front Sight, you will likely face criminal and civil liabilities if you decide to use deadly force — even if you are completely justified. You might also face:
- Jail
- Notoriety
- Legal fees
- Months/years in court proceedings
- Lost friends
- Self-doubt
The alternative is that you are dead. Factors that help determine your liability:
- How well you handled the situation
- The reputation of your adversary
- Your post-shooting emotions
- How you handle the 911 call
Front Sight advises that in your 911 call, you:
- Identify yourself.
- Describe yourself so that when officers arrive they have a better chance of not mistaking you for a perp
- Give a brief overview of why you're calling. Remember that everything you say may be used against you at some point.
- Give your location.
- Ask them to send police and an ambulance.
- Tell them you want to press charges.
When the police show up, find out if you're going to jail, or might be released. This might require asking the person questioning you if he has the authority to make this determination, and if not, speaking with the person who does have that authority. In any event, stick to the simple facts of the case, and ask to go home as soon as you have given your basic statement.
As you can tell, Front Sight's recommendations for dealing with authorities is more nuanced than that from the "five words" crowd ("I have nothing to say."), but might help you avoid an overnight stay in jail. Another alternative is to be as cooperative as possible while sharing as little information as possible, and if the questions start going in a direction that seem not to be in your favor, telling them that you really, really want to cooperate fully, but that the questions are making your uncomfortable and that you need to speak with an attorney before you say anything more.
2:15-5:00 Range activities
Back on the range for the afternoon, you start off with designated head shot, which is the shot you must take when your opponent's torso is armored, covered, or behind a cover or a hostage.
Beneux also revealed that the reason for the emphasis on a well-drilled presentation to the ready is that getting your weapon out of the holster as quickly as possible, tells your opponent that you are familiar with your weapon, if nothing else.
Beneux also informed us that end-of-the-course evaluation includes malfunction drills for time and correctness. Therefore, we dry practiced malfunction drills.
We were told to bring a concealment garment for class the next day, which is one of the biggest reasons to take the four-day course as opposed to the two-day course, as there is no presentation from concealment in the two-day course.
If memory serves, today saw a student drop out from dehydration, despite the mild weather conditions and the copious amounts of water provided by Front Sight. Fortunately, she was able (narrowly) to avoid a trip to the hospital after she returned to her hotel room, but she was unable to continue training. Stay hydrated!
5:15-6:00 Classroom lecture — Basis of Tactical Movement
Tactical movement involves activities such as clearing a house.
First rule: Don't do it if you don't have to. If they're after your TV, let them get it. If a family member is in jeopardy, then you have to respond. Tactics don't guarantee success — You still need to execute your shots. Seven principles
- Keep the element of surprise.
- Make use of cover and concealment.
- Play the angles / slice the pie when going through doorways and other choke points.
- Inspect everything.
- Pace of movement. Individual action is slow, for safety. Only move as fast as you can guarantee good hits.
- Maximize your distance. Distance favors the trained shooter.
- Avoid fatal funnels.
Front Sight teaches students to walk normally, forward and backward. No fancy walks or footwork.
To clear a corner, Front Sight teaches you to stand back as far as possible to avoid getting by a ricochet (this is especially true when your opponent is using a shotgun). Take small steps. Scan vertically as well as horizontally. When making small movements, step with your front foot and then trail with your other foot, keeping your balance at all times. Once the corner is clear, go back to regular walk. If it's not clear, inspect and identify. Make certain of your target before shooting.
When going around an off-hand corner, use your strong hand.
How to go through a door:
- Approach from the door-knob side. Get all the information you can about the door, hinges, closers, etc., before committing to going through. Look for light, listen for noises beyond the door.
- Approach at a 45 degree angle to give yourself room, while maintaining cover.
- Bring the gun all the way back to position 3.
- Turn door knob all the way, slowly and silently.
- Flip the door open hard. Step back a couple of feet at a 45 degree angle, weapon to the ready.
- Inspect what you can now see. Few persons can hide on an eight-foot wall when you're looking through the door situated along that same wall.
- Step-and-trail, vertical scan. Do complete scan from side to side.
- Go all the way to the other wall / side of the door — don't pause in the doorway.
- As you breech the face of the door, extend your arms/gun and walk through looking for targets.
After this section of the course, you'll never look at a cop TV show the same again. The way they go through doors may be great for keeping the pace of the show up and leaving room for commercials, but it's also a great way to lose your weapon or worse.
Day Three
After two days of near-perfect weather, there was a bit of a breeze on day three. Fortunately, it came from directly behind the shooters on the line.
8:00-12:30 Range activities and tactical exercises
Day Three starts off with the basics of concealed carry, stressing that you must find a balance between concealment and accessibility. Concealment means concealment: You must keep the gun covered.
To present while carrying concealed while wearing an open-front garment:
- Cup your strong hand.
- Grab the front of the garment and sweep it back out of the way.
- Drop your strong hand down onto your gun, and proceed with the standard presentation.
Some people recommend putting a small weight in the bottom corner of your conceal garment so that when you sweep it out of the way, it develops some inertia and stays out of your way while you complete the presentation, as does Front Sight.
To retrieve another magazine when carrying concealed wearing an open-front garment:
- Either sweep the garment out of the way with your support hand; or use the "hitchhiker's thumb" to lift the hem.
- Index and remove the magazine as normal.
To reholster when carrying concealed with an open-front garment:
- Grab the front of the garment on the strong side with your support hand.
- Force the garment back under the armpit on your strong side.
- Trap the front of the garment with your upper arm on your strong side.
- Reholster as normal from Count 3.
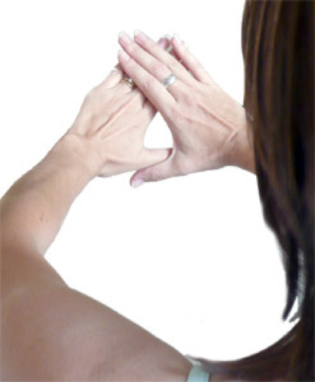
To present while carrying concealing wearing a closed-front garment
- Reach across your body with your support hand.
- Grab the hem of your conceal garment near where your gun is.
- Pull the hem up and across your body to ensure that it clears your gun.
- Present as normal: Your support hand should already be against your torso, ready for Count 3.
- Reverse the procedure to reholster.
No matter how you carry, dry practice from concealment. By this time, everyone in the class that I could see was well on his way to mastering the basics. Beneux must have thought so, too, as he then shared some tips for increasing your speed on presenting to the target:
- Present faster: Really give your torso a hard slap with your support hand; your strong hand will then try to keep up.
- Flash sighting: If you are at seven yards or closer to your target, pull the trigger as soon as you see the front sight is on your target, regardless of the sight alignment.
- Compress your trigger pull: Combine the take-up of the slack and actual trigger pull into one smooth, fast movement.
These weren't just gratuitous suggestions, as the end-of-course skills drill would be timed, making it critical to eliminate wasted movement and maximize efficiency.
12:30-1:30 Lunch
12:45-1:15 Supplemental lecture — How to Select a Defensive Handgun, Tactical Shotgun, Practical Rifle, and Weapons Modifications
I only caught the first half of this lecture because I needed to make a couple calls, which was disturbing because the lecturer really seemed to know his stuff. I wish I'd be able to stay for the entire lecture. Next time, I'm taking notes.
Actually, that brings up another pointer: Consider taking notes during the lectures. Lectures are much more time-constrained than range activities, and if you think you'll just wander up after the lecture and ask a few questions you're likely to be disappointed because there will be lots of competition for the lecturer's time. You almost certainly better off button-holing the lecturer between other activities, as most of them seem to be on-site all day. At any rate, don't expect to have a lot of time to chat with the lecturers.
1:30-5:00 Range activities and tactical exercises
After the lecture, it's back to the range, and division into small shifts to visit the Tactical Movement area (AKA "Monsters Inc." because of the free-standing doors on the range), and the Live Fire simulator (AKA "Fun House" or "Shoot House"). (Two-day course students visit these two areas on the afternoon of their second day.)
The Front Sight technique for going through a doorway eliminates or minimizes almost all of the danger points in this extremely dangerous maneuver. (see the steps above)
Next, Beneux introduced us to the ragged hole drill, a drill he uses to start and end each of his range sessions. From whatever distance works for you (typically three to seven yards, depending on your skill level), you fire five shots at a one-inch square target, trying to place all five shots close enough that they touch (hence, the ragged hole). After that, you repeat the same procedure, only with dry practice. Then you finish up with another five live rounds. It's astonishing how much better you shoot the final five compared to the first five, thanks to the dry practice. The four one-inch targets appear on each Front Sight target just for this drill.
Knowing that I'd be tested on malfunction drills in less than 24 hours, I went back to the cottage and repeated each drill in hopes I'd remember all the steps in the correct order, and do them quickly enough to avoid embarrassment, if not the time limit.
Day Four
Still petrified about the malfunction drills test later in the day, I arrived early and practiced some more, not very encouraged that I was already mangling the order of steps to clear the Type 3 malfunction. This is definitely a candidate for dry practice. Day Four brought a bit stronger winds than Day Three, but still from directly behind, so the only real issue was for people with light open-front concealment garments, which wanted to blow closed the moment they were swept them out of the way. As with the previous three days, though, the temperature was just about perfect.
8:00-12:30 Range activities
Day four teaches you to engage multiple targets. In addition to your other training, Front Sight teaches you to move to a position where you can engage all the bad guys on your terms, the way you want to. Front Sight also teaches students to observe boarding house rules: Everyone gets one round before anyone gets a second.
To engage the targets more quickly, Front Sight teaches students to move to shoot the next target during the recoil phase, resetting the trigger along the way. In your after-action drill, Front Sight teaches you to check your targets in the order you engaged them.
After this comes a head-to-head competition in the form of a hostage drill with red, white, and blue targets. The red target is hiding behind a steel "hostage," so must take a head shot. Also, you must make your head shot (AKA "designated head shot") before engaging the two more distant steel targets. Whoever is faster without hitting the hostage moves on. The other one sits down.
I got a comeuppance on this drill, as I had been shooting well all day and rushed my designated head shot. Unfortunately, I not only hit the hostage, but in so doing moved the target in such a way that I thought I'd made my head shot. It probably took me two seconds to figure out what had really happened, and another couple seconds to reacquire and hit the target. If I hadn't been disqualified for hitting the hostage, I would have been out on time.
12:30-1:30 Lunch
1:30-5:00 Range activities and skills test
After lunch Beneux had us revisit the ragged hole drill, after which we took the skills test, which in addition to the dreaded malfunction drills includes shooting at various distances with various scenarios. After my attack of hubris during the head-to-head competition, I really attempted to focus on what I'd learned during the four days, and employ it as best I could in the allotted time. Here for me, the dry practice paid off, as for the first time ever I nailed each of the malfunction drills, performing each of them correctly in its allotted time.
After the skills test we took our seats for the last time as Beneux handed out course certificates and awards. I think he was as amazed as I was, that I'd earned the "DG" award, which in my case should stand for "Dangerous Grasshopper," but which at Front Sight stands for "Distinguished Graduate."
End comments
In my experience, the typical class at Front Sight has close to 40 students, with some who have never handled a gun before, some who have been through the class one or more times before (and maybe carry a gun in their line of work), and everything in between. If you have a bit of experience handling your weapon, you may convince yourself that during the first day and a half when most of the drills are done at the pace of the instructor's commands, that you don't need to pay attention to every little thing the instructor says. This is a big mistake. The instructor's commands are part of the repetition process by which you learn the Front Sight method. It must be gruelingly tedious for the instructors to have to issue each command hundreds of times over the course of the class, but what a gift it is to the student who listens. To give just one example, when you bring your weapon up to shoot, the natural inclination is to focus on your target. Good shooters know that this is exactly wrong, as you want to focus on your front sight (hence the name, "Front Sight"). Under stress, studies show that you'll lose half of the skills you acquire through drills. If you should ever need to use a weapon to defend yourself or others, you'd better hope that you hear your instructor's voice in the back of your mind saying, "Hard focus on the front sight!" After having heard it hundreds of times, and — hopefully — having practiced it, you might actually be able to execute it when it really counts in a life-or-death situation.
If you're like me, you may feel that waiting to follow the range commands means you're not getting to shoot as much as you could if you just sped everything up right away. Don't worry. In the four-day course, you'll do plenty of shooting, and there will be plenty of time to do it, if for no other reason than even if you finish right away, you still have to wait for the rest of the line to finish before moving to the next action. You might as well focus on each range command, and master every step as you go, so that as the instructor picks up the pace, you've mastered the steps themselves.
Random thoughts
After graduation as a reward, I went to Mom's Diner in Pahrump and had a great meal. They really are the place to go in Pahrump. The interesting thing for me was that there were a bunch of other Front Sight students there at the time, and many were openly carrying a weapon. For me, having been at Front Sight with nothing but weapons as far as the eye could see, it seemed normal (plus, I recognized them as having been in one of the other classes). Looking back, though, it's weird in a wonderful way to have experienced that. Kudos to Mom's Diner, not only for the great food, but also for supporting our 2nd Amendment rights.
Finally, with the training officer's story in mind, I approached law enforcement representatives in my area, in hopes that I could donate some Front Sight memberships to them. Unfortunately, they are prohibited from accepting personal donations in excess of a certain amount, and Ambassador memberships seem to be way above the upper limit. I'm still working on this one.